Design Your Own Button Badges and Fridge Magnets Online: The Badge Designer Guide
Ordering badges for an event usually starts with a problem: the printer wants a print-ready file, and you don't have one. The Badge Designer is where you make that design yourself, in your browser, at the exact size your badge maker uses. You don't need design software, and you can start designing without an account.
This guide covers everything on the page, from choosing a size to getting the finished design to your seller.
Who it's for
- Event organisers, schools, clubs and shops who are buying badges or magnets and want to supply their own artwork.
- Anyone ordering from a local badge maker. The files work with any seller, whether or not they use My Badge Studio.
- Badge sellers who want a blank canvas for one custom design, then want to place it on a print sheet.
Badge Designer or Studio?
My Badge Studio has two tools, and they do different jobs:
| Badge Designer | Studio | |
|---|---|---|
| Best for | Creating one design from a blank canvas | Laying out many badges on a sheet to print |
| You work with | Free layers: several photos, text, shapes, icons | One photo per badge, with text and frames on top |
| You finish with | A PDF, PNG and JPG, or a link for your seller | A full print sheet with cutting guides |
They work together: you can send a design from the Designer straight to the Studio, which we cover below.
Step 1: Choose your size
When you open the page, pick what you're making. Ask your seller which size their machine uses before you start. You can change the size later, and your design scales to fit, but it's easier to design at the right size from the beginning.
| Product | Size you see | Printed and cut at |
|---|---|---|
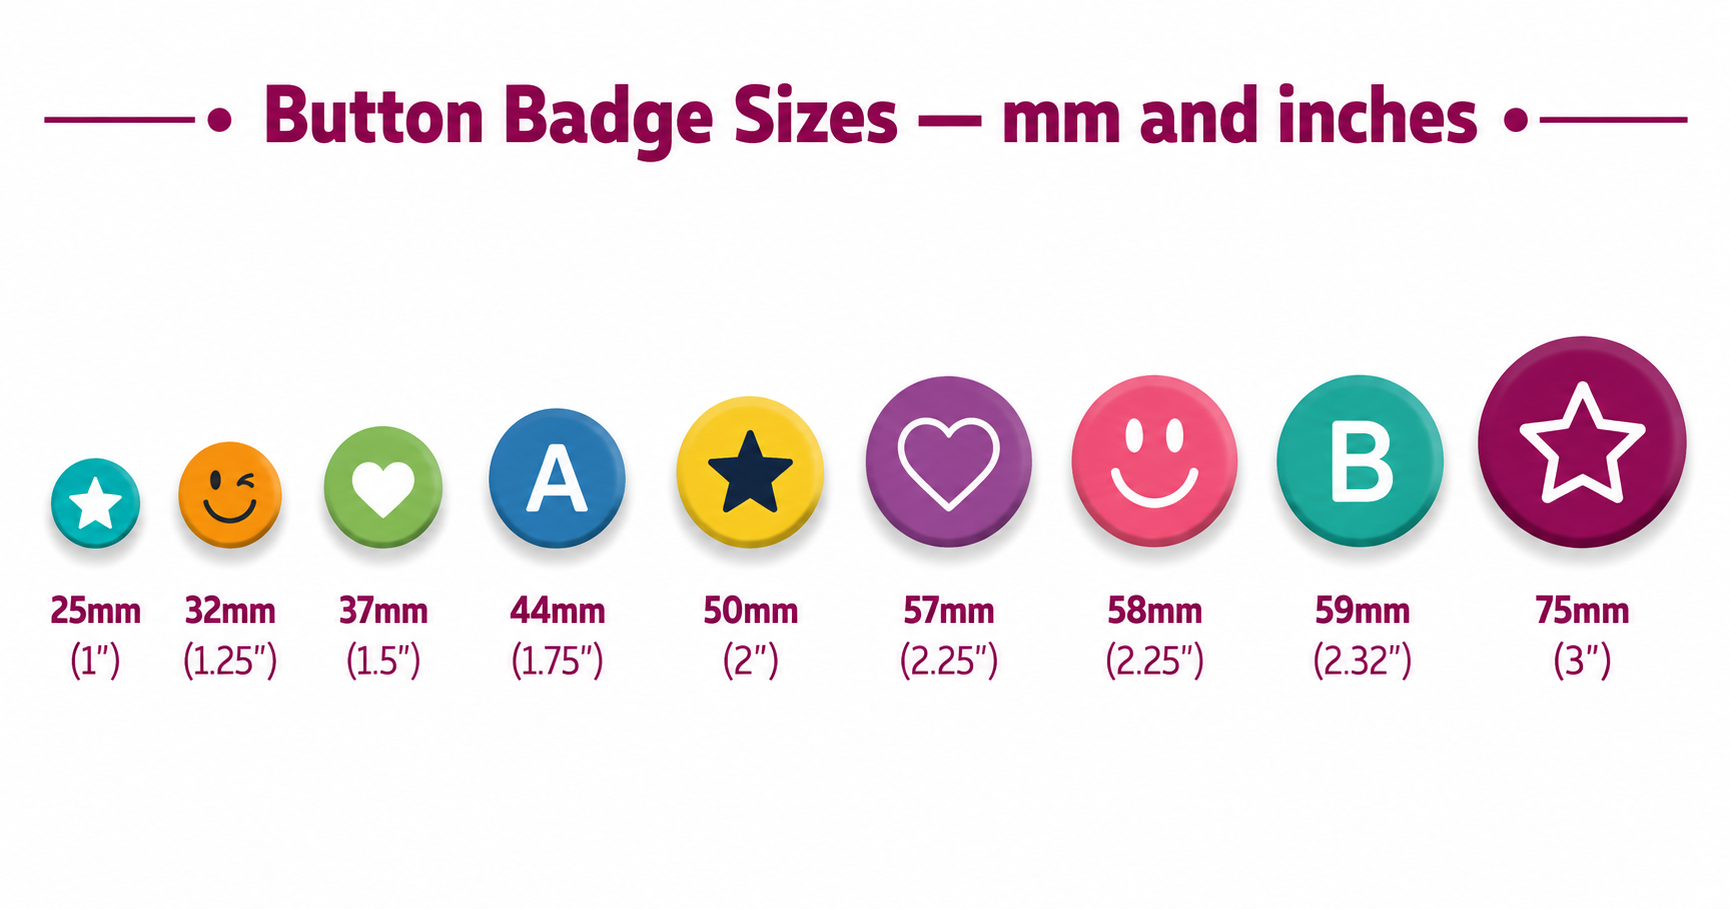
| Round button badges | 25, 32, 37, 44, 50, 58 or 75 mm | 35, 44, 49, 54, 60, 70 or 85 mm |
| Oval button badge | 65 × 45 mm | 75 × 55 mm |
| Heart button badge | 57.5 × 53 mm | 70 × 63 mm |
| Square fridge magnets | 50 × 50 or 63.5 × 63.5 mm | The same size |
| Rectangle fridge magnet | 90 × 65 mm | The same size |
| Round fridge magnet | 58 mm | 70 mm |
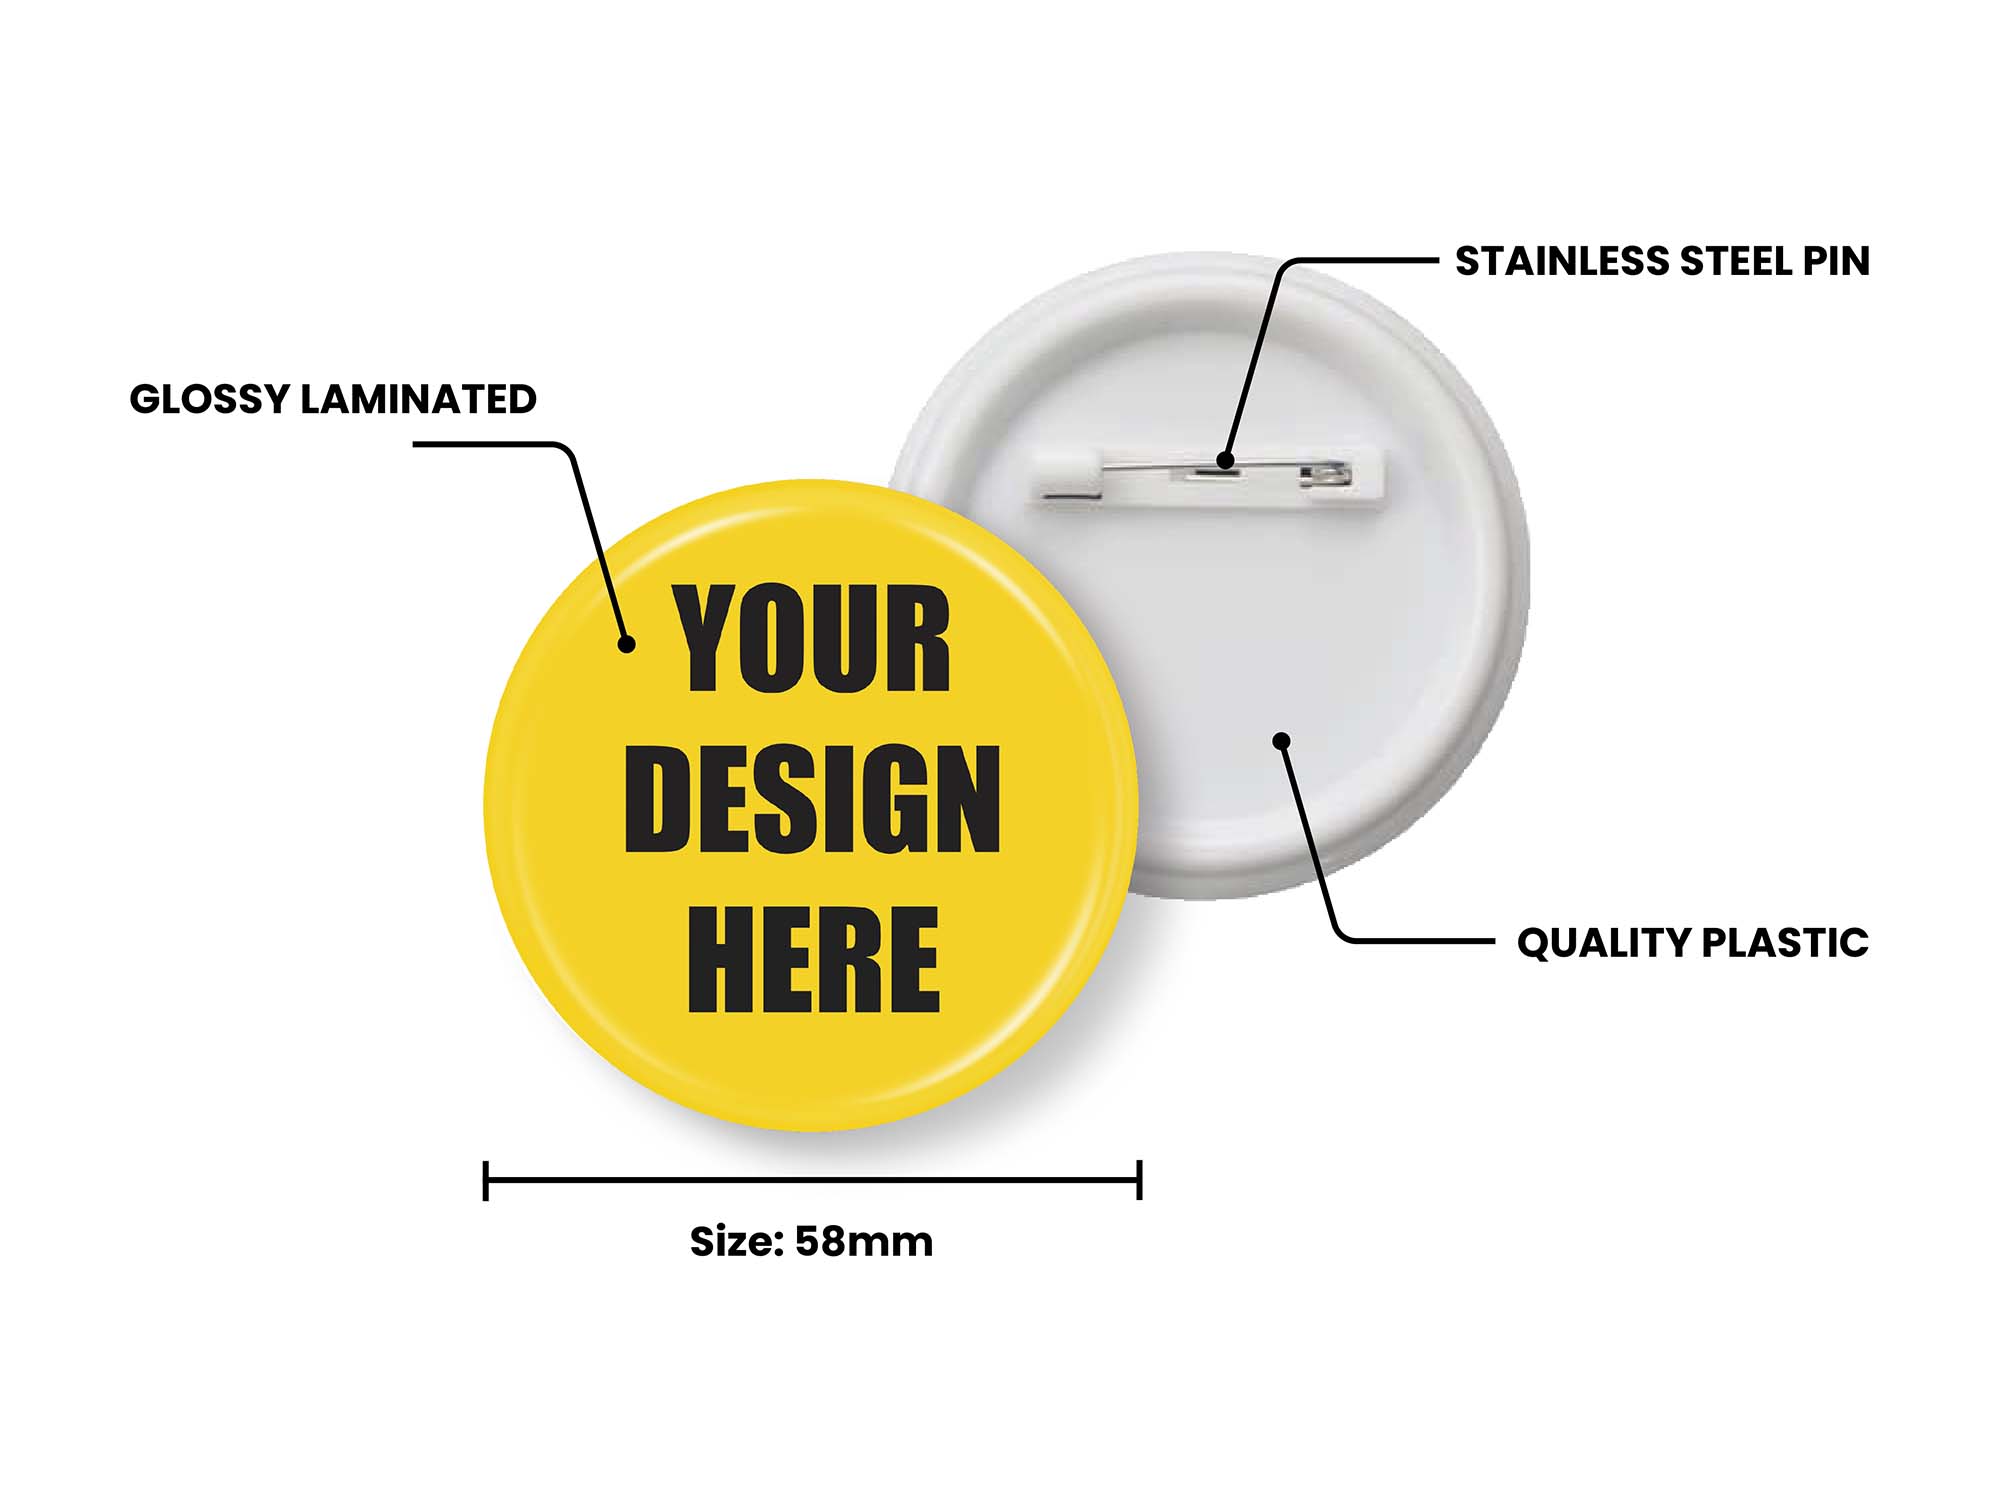
Why are the two sizes different? A button badge's paper wraps around the edge of the button, so it's printed larger than the part you see. The Designer shows both on the canvas: the dashed pink line marks what stays visible, and the grey line is where it gets cut. Keep your words inside the pink line, and let backgrounds run all the way to the grey one. There's more on this in our badge sizes chart.
Using a custom size
If your seller's machine isn't listed, open the Size tab and choose Custom size:
- Pick a shape: Round, Oval, Rectangle or Heart.
- Enter the Inner size, the part that shows on the finished product (5 to 300 mm).
- Enter the Outer size, the cut line, including the extra that folds around the back. Use your seller's figure for button badges, and make it the same as the inner size for magnets and other flat items.
- Check the line under the boxes, which tells you what will print, then choose Use this size.
The screen zooms to suit your window, so check the "Prints at" label at the bottom of the canvas to see the true size.
Converting a design to another size
Made a 58 mm design and need it at 44 mm too? There's nothing to redo. Open the Size tab and pick the new size. Your text, pictures, shapes, outlines and shadows all resize in one click, and everything stays inside the new safe line. Change your mind and choose Undo. To keep both sizes, save the first one before you convert.
Step 2: Add your text
Open the Text tab and add a heading, subheading, body text or a name. Double-click any text on the canvas to type straight on it.
Select the text to reach its controls: font, size, bold, italic, underline, capitals, alignment, letter spacing, line height, and a solid or gradient colour. There are 167 fonts to search or browse by category, including sans serif, serif, bold display, script, handwritten, fun, retro and typewriter.
Designing in another language? The Indian languages category has fonts for Hindi, Tamil, Telugu, Kannada, Malayalam, Bengali, Gujarati and Punjabi.
Start from a ready-made text style
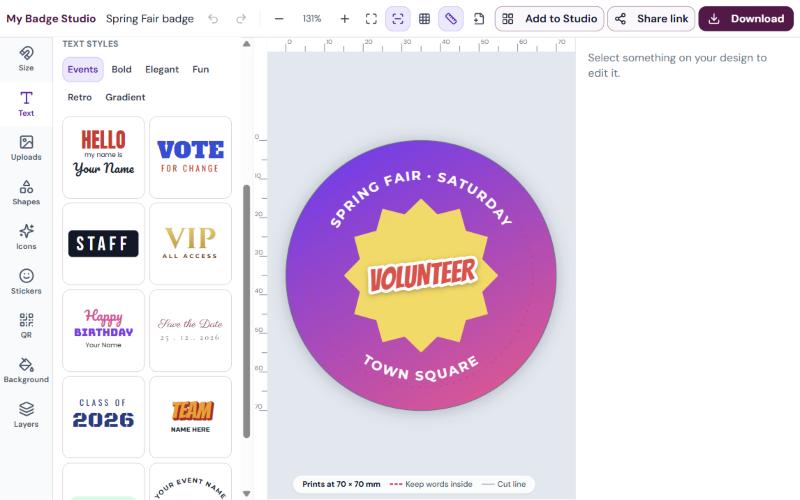
Not sure where to begin? Below the buttons in the Text tab, there are 42 text styles grouped as Events, Bold, Elegant, Fun, Retro and Gradient. Click one to add it, then type your own words over it. A style with several lines is added as a group: double-click one line to change it on its own.
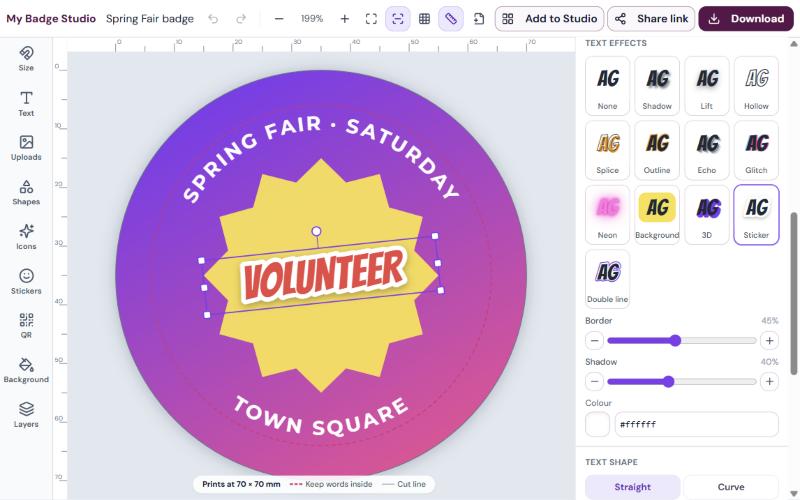
Text effects
Select your text and choose from the Text effects tiles, which preview each effect in your own font. Each one has its own sliders and colours.
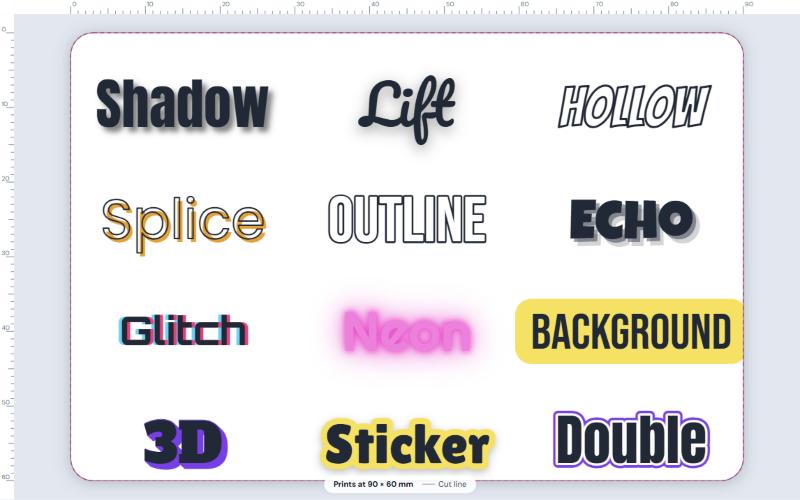
| Effect | What it does | Try it for |
|---|---|---|
| Shadow | A shadow you can move, blur and colour | Text over a photo |
| Lift | A soft glow of shadow beneath the letters | A subtle raised look |
| Hollow | Outlined letters with nothing inside | Large, simple words |
| Splice | An outline with an offset colour fill | Retro and poster styles |
| Outline | A coloured line around solid letters | Making words stand out on a busy background |
| Echo | Fading copies behind the letters | A sense of movement |
| Glitch | Two offset colours, like a broken screen | Gaming and tech events |
| Neon | A glowing tube-light look | Dark backgrounds, where it looks best |
| Background | A coloured panel behind the words | Names and labels, such as Staff |
| 3D | A solid block of depth behind the letters | Team names and bold slogans |
| Sticker | A thick border, with an optional shadow | Fun, die-cut style words |
| Double line | Two outlines in two colours | Comic and retro looks |
Curves and text around a circle
Under Text shape, you can keep your text straight, curve it as an arch, or run it around a circle. Circle top and Circle bottom are made for round badges, with the event name around the top and a place or date along the bottom. Each one starts around the badge's edge, and Spread words around the whole circle spaces them evenly. If the words are too long to fit, a message tells you. Type curved and circular text in the box in the side panel.
Step 3: Add pictures and graphics
- Photos and logos: upload JPG, PNG or WEBP files, drag them in or paste them. You can use several in one design, and frame (rounded, circle, heart, star or hexagon), adjust and filter each one. To crop, double-click a picture, drag the corners or edges, and drag the picture to reposition it inside the frame. Choose Use as background to fill the whole badge. For sharp prints, use a picture at least 1000 pixels wide.
- Shapes: 15 to choose from, including stars, shields, ribbons and speech bubbles, with gradient fills and solid, dashed or dotted borders.
- Icons and stickers: search the icons, or browse the sticker library.
- QR codes: paste a link and add it. Keep it dark on light and at least 20 mm wide so phones can scan it, and test it on your phone before you print.
- Backgrounds: a solid colour, or a linear or radial gradient.
Step 4: Arrange everything
Everything you add is a separate layer you can drag, resize and rotate. Guides appear as you drag, so things snap into line. You'll also find:
- Layers: reorder, hide or lock anything, and group items so they move together.
- Align and space evenly: one item aligns to the badge, and several align to each other.
- Exact numbers: every number has − and + buttons. Tap for one step, or hold to keep going.
- Effects for any layer: opacity and blend modes.
- Rulers and a grid in millimetres, plus zoom and pan.
On a computer, these shortcuts save time:
| Keys | What they do |
|---|---|
| Ctrl+Z / Ctrl+Y | Undo / redo |
| Ctrl+S | Save the design to your device |
| Ctrl+D | Duplicate |
| Ctrl+G / Ctrl+Shift+G | Group / ungroup |
| Ctrl+0 | Fit to screen |
| Delete | Remove what's selected |
The Designer also works on a phone, with the tools along the bottom of the screen.
Save your design and come back later
Not finished? Choose File, then Save design to my device. This creates a .mbdesign file on your laptop or phone, with every layer and picture inside it. It's free with a free account, and no plan is needed.
To carry on, choose File, then Open design from my device, and pick the file. Everything opens as separate layers, ready to edit, even on another computer. On a computer, you can also drag the file onto the canvas. Saving again creates an updated copy, so keep your files somewhere easy to find.
A .mbdesign file is for editing only. To print or send your design, use the files or the link below.
Step 5: Download your files
Choose Download to get all three formats, with no watermark. Every plan includes unlimited downloads. Without a plan, a 7-day pass gives you unlimited downloads, share links and adds to the Studio for a one-time payment.
| File | What's in it | Best for |
|---|---|---|
| One page with just your design, at its exact size | Most sellers | |
| PNG | 300 DPI, transparent outside the shape | Placing on another layout |
| JPG | 300 DPI on white | Sending over chat or email |
Each file holds one design, at the size it's printed and cut. Want a full page of badges? Choose Share, then Add to Studio, covered below. Printing it yourself? Always print at 100% / Actual size. Our guide to printing badges at the right size shows how in each app.
Step 6: Send your seller a link
You don't have to send files at all. Choose Share, then Share link and Create link, and copy it or send it on WhatsApp. Making a link needs a plan or a 7-day pass. Opening one needs no account.
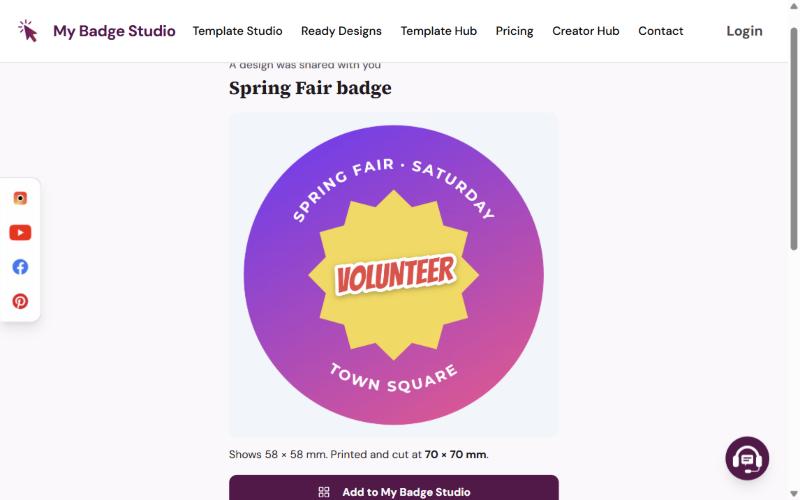
Your seller sees the design and its exact print size. With a plan or a 7-day pass, they can add it to My Badge Studio in one click or download the picture. A few things to know:
- A link works for 90 days from when you create or last update it.
- Later changes don't appear on their own. Choose Update link with my latest changes when you've edited the design. The address stays the same.
- Anyone with the link can see the design. Only send it to people you want to see it.
- You can stop sharing whenever you like, from the same browser. That deletes the stored picture straight away.
Creating a link stores a picture of your design on our servers. Your design otherwise stays in your browser.
For sellers: add a design to your print sheet
If you print badges yourself, there are two ways to get a design into the Studio, with a plan or a 7-day pass: open a customer's link and choose Add to My Badge Studio, or choose Share, then Add to Studio, at the top of the Designer. Either way, the design arrives at its full printed size, on a sheet set up for that size.
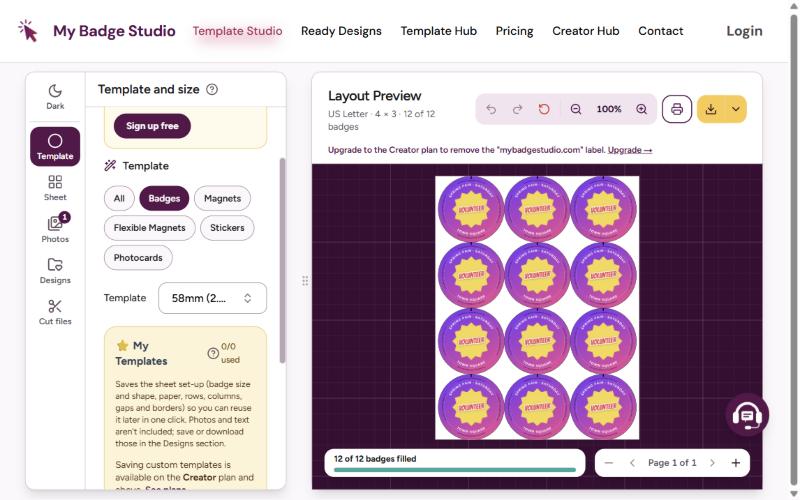
- Same size as your open sheet? It joins that sheet, so you can collect several customers' designs on one page.
- A different size? It starts a new sheet, and your earlier one is offered under "Continue where you left off".
- Need more copies? Set the quantity to fill the page.
The design arrives as one finished picture, so its words and photos can't be changed in the Studio. If something needs fixing, the customer can edit it and update their link. Your usual Studio plan applies when you print or download the sheet. For more on working with customer artwork, see getting print-ready files from customers.
Tips for a badge that looks good in real life
- Use fewer words than you think. A badge is small and usually read from a distance, so choose a few large words over a full sentence.
- Make the name the biggest thing on a name badge.
- Choose strong contrast. Dark on light or light on dark reads best, and an Outline or Shadow effect helps text stand out on a photo.
- Keep important things well inside the pink line, especially on small sizes, so nothing disappears around the edge.
- Check the spelling of every name and date before you send anything.
- Print one first. Colours on paper can differ from your screen, so make a test badge before a large order.
Good to know
- Your design is saved in this browser. Business Plus and Business Pro can also save designs to their account, 25 and 50 designs, and open them on any device. It's kept when you refresh, but clearing your browsing data removes it, and it won't be on your other devices. Use File, then Save design to my device, to keep your own editable copy.
- A new design replaces the current one. The page warns you first, and offers to save the current one to your device.
- Files are RGB, which suits most badge makers and home printers. If your seller needs CMYK, ask them to convert the file.
- You can't upload your own fonts yet, though you can choose from the 167 included.
- Designs don't reopen as editable layers in the Studio. Keep editing in the Designer.
- The page itself is in English. Your designs can use any of the supported languages.
Ready to make yours? Open the Badge Designer, pick your size and start with a single word. You can always change it later.
Preguntas frecuentes
Is the Badge Designer free?
Trying the Designer is free with no account, and saving to your device is free with a free account. Sharing a link, adding to the Studio and downloading need a plan, which includes them unlimited, or a one-time 7-day pass.
Do I need an account?
Not to try the Designer or to look at a share link. You'll be asked to create a free account when you save, share, add to the Studio or download, and your design stays in your browser while you do. Saving to your device is then free. Making a link, adding to the Studio and downloading also need a plan or a 7-day pass.
What files do I get?
A one-page PDF, a 300 DPI PNG that is transparent outside the shape, and a 300 DPI JPG on white. Each holds just your one design at its exact printed size. For a full page of badges, choose Share, then Add to Studio.
Will my badge maker accept these files?
The files are standard PDF, PNG and JPG at 300 DPI, so they work with most badge makers, and your seller doesn't need My Badge Studio. It's still worth asking which size their machine uses before you start, and whether they need CMYK, because the files are RGB.
How does the share link work?
Choose Share, then Share link and Create link, and send it to your seller. They see the design and its size, and with a plan or a 7-day pass they can add it to My Badge Studio in one click or download the picture. Making a link also needs a plan or a pass. A link works for 90 days from when you create or last update it, and you can stop sharing from the browser that made it.
Why is the printed size bigger than my badge size?
A button badge's paper wraps around the edge of the button. A 58 mm badge, for example, is printed and cut at 70 mm. Keep your words inside the dashed pink line, and let backgrounds run to the grey cut line.
Can I convert a design to another size?
Yes. Open the Size tab and pick the new size, and everything in your design resizes in one click, staying inside the new safe line. Choose Undo to go back. To keep both sizes, save the first one before you convert.
Can I make a size that isn't listed?
Yes. In the Size tab, choose Custom size, then pick a shape and enter the inner size and the outer cut line. Make them the same for magnets and other flat items. Check the Prints at label on the canvas to confirm the result.
Can I use Hindi, Tamil or other languages?
Yes. The font list has an Indian languages category with fonts for Hindi, Tamil, Telugu, Kannada, Malayalam, Bengali, Gujarati and Punjabi. The Designer page itself is in English.
Can I save my design and finish it later?
Yes. Choose File, then Save design to my device, to create a .mbdesign file. Later, choose File, then Open design from my device, and every layer opens ready to edit, even on another computer. It's free with a free account, and no plan is needed.
Can I edit the design after adding it to the Studio?
It arrives in the Studio as one finished picture, so its words and photos can't be changed there. Make changes in the Badge Designer, then add it again.