How to Make Die-Cut Stickers at Home: Design, Print, and Cut
Die-cut stickers — the ones cut tightly around the artwork, white border and all — look like a print-shop product, but the whole workflow fits on a desk: design the sheet in your browser, print it on an inkjet, and cut it with a machine or a good pair of scissors. This guide walks through all of it, including which cut file each cutting machine actually accepts.
Die-cut vs kiss-cut: which are you making?
Two words that decide your settings later, so let's pin them down first:
- Die-cut — the cut goes through the sticker and its backing paper, so each sticker becomes its own free-standing piece, shaped like the artwork.
- Kiss-cut — the blade cuts the sticker layer only and "kisses" the backing, leaving whole sheets with peelable stickers on them. This is what sticker sheets at a stationery shop are.
Home cutting machines do both — it's just a blade-depth setting. Everything below applies to either; if you're cutting with scissors, you're making die-cut stickers by definition.
What you need
- A printer. Any inkjet works; laser printers need laser-rated sticker paper.
- Sticker paper. Matte is forgiving and writable; glossy makes colours pop but shows fingerprints. For water-resistant stickers (laptops, bottles), use printable vinyl and add a laminate sheet over the print before cutting.
- Something to cut with. A cutting machine (Cricut, Silhouette Cameo, Brother ScanNCut, or any generic vinyl cutter) gives perfect edges — but scissors genuinely work for simple shapes, because the design tool prints a white margin around every sticker that hides small wobbles.
Design the sheet — free, in your browser
The sticker sheet template lays the grid out for you: 50×50 mm stickers fit 12 to an A4 sheet, and the 75×75 mm template fits 4 — spaced so a cutting machine can still read the sheet. Both come in A4, US Letter, A3 and A3+ sizes.
- Pick a sticker template. In the studio, open the template menu and choose the Stickers group — 50 mm or 75 mm, on your paper size.
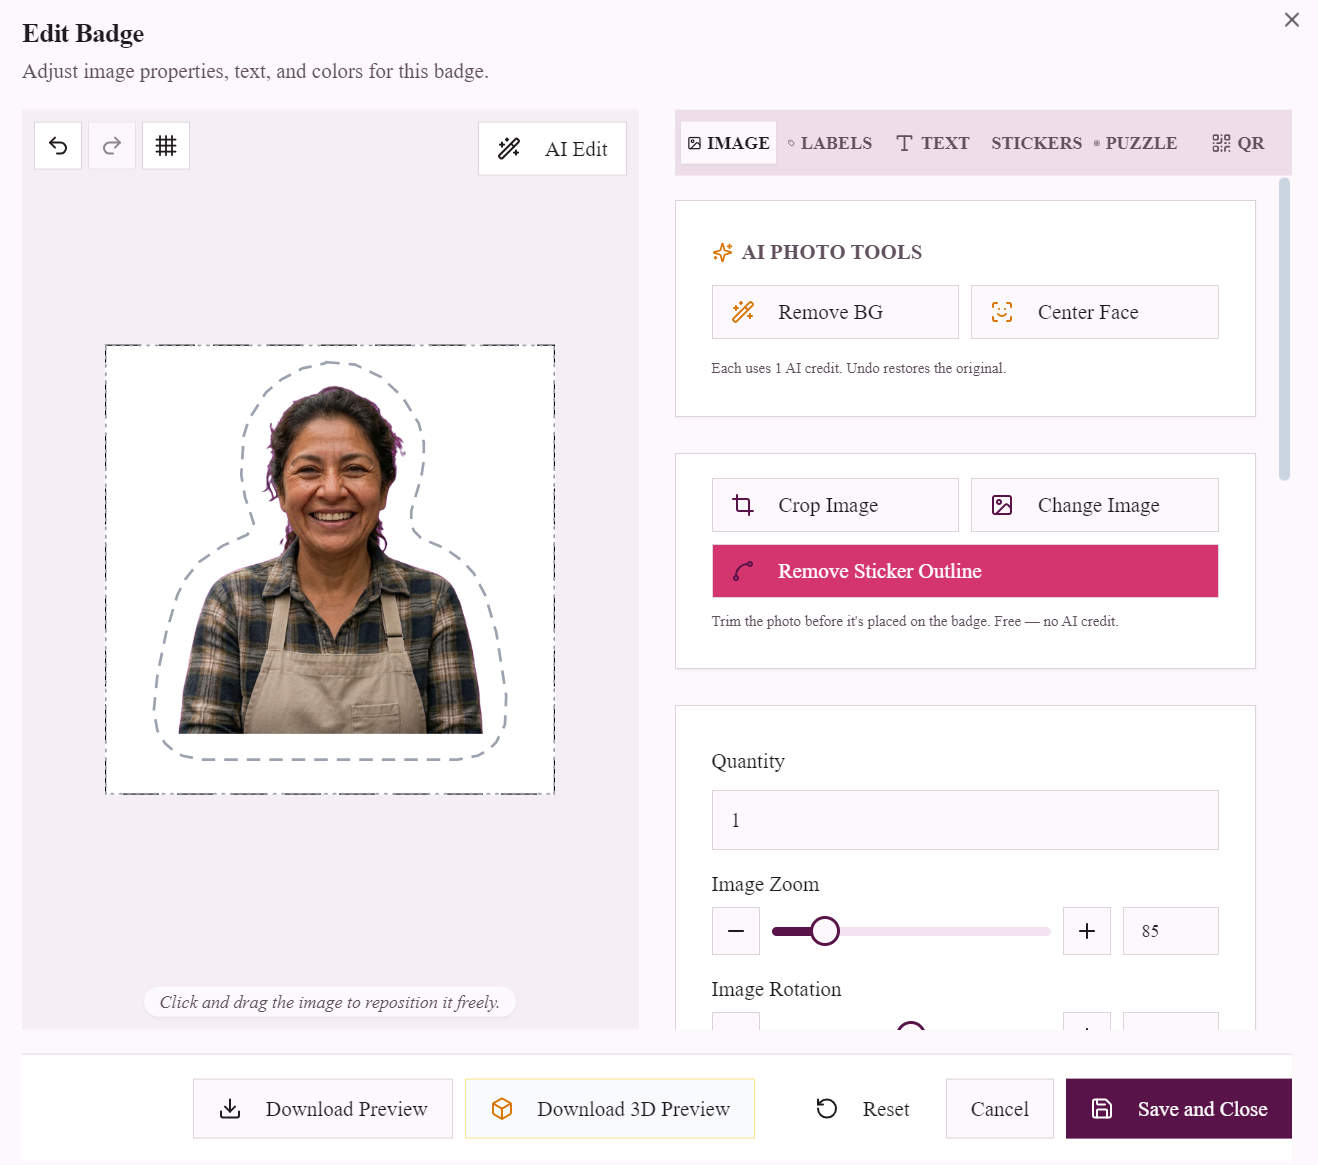
- Upload your artwork. PNG with a transparent background is ideal, but any photo or drawing works — the built-in Remove BG button strips a background in one click.
- Add anything else. Text, shapes, even a QR code — whatever is in the sticker is treated as one design.
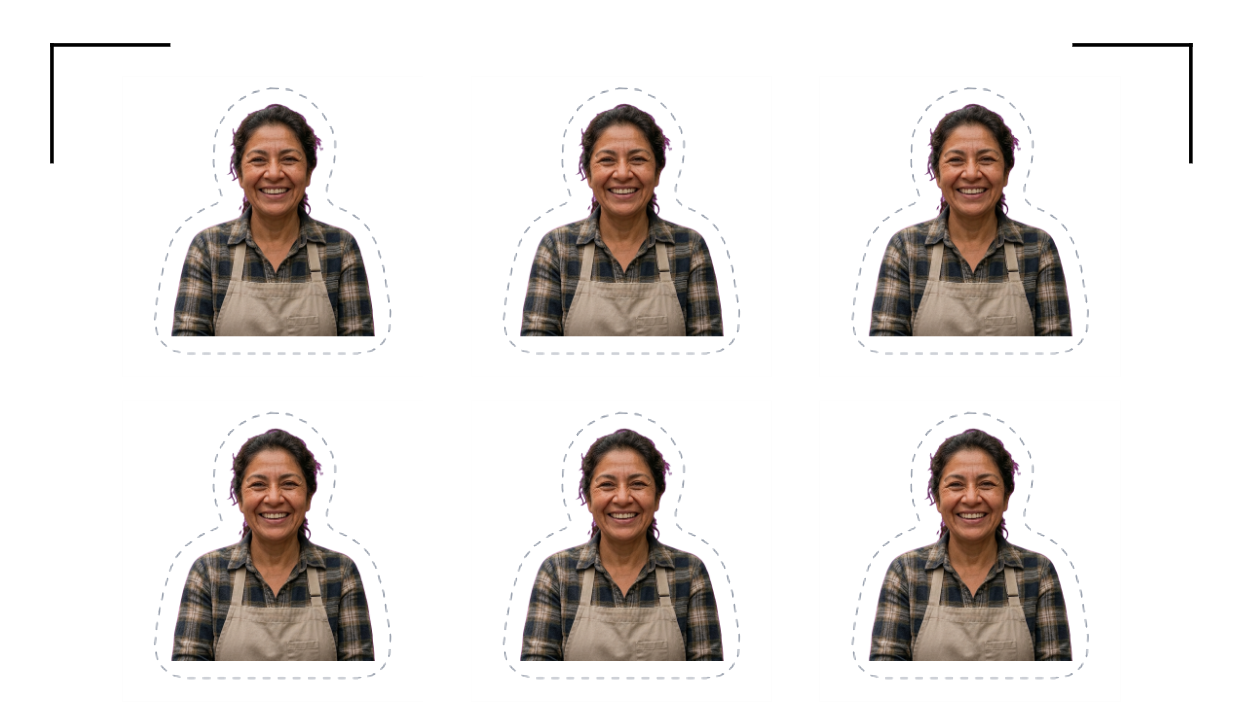
- Click Sticker Outline (die-cut). The tool traces a smooth cutting line around everything in the sticker automatically, with a small white margin — the contour a cutting machine will follow, and the border you'll cut along by hand. Re-run it any time you change the design.
- Arrange the sheet. Stickers on a sticker template move freely — drag them anywhere on the sheet to mix sizes and pack the layout tight.
How many stickers per sheet?
| Sticker size | A4 | US Letter | A3 | A3+ |
|---|---|---|---|---|
| 50 × 50 mm (2 in) | 12 | 10 | 30 | 35 |
| 75 × 75 mm (3 in) | 4 | 4 | 12 | 20 |
Those counts leave the sheet's four corners empty on purpose — that is where registration marks go, and every print-then-cut machine needs clear paper around them to find the sheet. It is the one thing that surprises people coming from ordinary printing: a sheet packed edge to edge cannot be machine-cut at all. If you are cutting by hand and don't need marks, raise the rows or columns in the layout panel and pack in more.
Cutting option 1: scissors
Print the sheet as a PDF at 100% scale (no "fit to page"), let the ink dry a few minutes, and cut around each sticker's printed white border. The margin the outline tool adds is your guide — small deviations disappear into it. This route costs nothing and is how most people make their first batch.
Cutting option 2: a cutting machine
Machines never cut along a printed line — they need the cut contour as a digital file, and they find the printed sheet's position using registration marks. The studio exports these next to the paper settings: Cut File (SVG) (artwork + cut lines), Cut File (DXF) (cut lines only), and Cut Lines Only (SVG) (the contours with no artwork). Which one you need depends on the machine:
| Machine | File to use | Workflow |
|---|---|---|
| Cricut | PNG (transparent) | Upload the sheet as a transparent PNG and use Print Then Cut — Cricut prints it, then auto-cuts each sticker from the transparent edge. Don't upload the artwork SVG (see the note below). |
| Silhouette Cameo / Portrait | DXF | The free Silhouette Studio can't open SVG (that needs the paid Designer Edition) — DXF opens in every edition. Add registration marks in Studio, print from there, cut. |
| Brother ScanNCut | SVG | Import into CanvasWorkspace, or load the SVG from USB directly on SDX models. |
| Generic / no-name vinyl cutters | SVG (or DXF for older software) | Import into your cutter's software (Sure Cuts A Lot, SignMaster, …). If your machine reads printed corner marks, turn on Show Cutting Mark → Mark style in the studio and match the L-mark measurements from your machine's manual before printing. |
Two details that save a wasted sheet: print at 100% / actual size so the printed sheet matches the file's millimetres, and check the size once after importing — some software second-guesses file units. The DXF even includes the sheet outline as a built-in ruler: if it measures exactly your paper size after import, everything else is in the right place.
A note for Cricut users
Cricut is the exception, because Cricut Design Space reads any uploaded SVG as cut-only geometry — it can't print the artwork inside an SVG, so it turns the image into a solid black shape. So for Cricut, don't upload the artwork SVG. Instead:
- Upload a transparent PNG of the sheet and use Print Then Cut. Cricut prints the stickers in full colour and auto-cuts each one from its transparent edge — leave a small gap between stickers so touching ones don't merge into a single cut.
- Or use Cut Lines Only (SVG) for just the die-cut contours (clean, movable cut shapes, no black), and pair it with the PNG for the print.
The Cut File (SVG) (artwork + cut lines) and DXF are for Silhouette, Brother and other machines that print from the vector — it's specifically Cricut that treats an SVG's image as black.
Tips for a clean batch
- Do a test cut on a plain corner of the sheet before committing — blade depth is the difference between kiss-cut and scrap.
- Let ink dry before laminating or cutting. Inkjet ink smears for the first few minutes, especially on glossy stock.
- Re-trace after big edits. The cutting outline is a snapshot — if you swap the image or move text, click Sticker Outline again so the contour matches.
- Keep artwork out of the corners when using printed registration marks: machines need clear paper around each mark to find it.
From here it's the same loop as our badge and magnet templates: design once, print a sheet whenever you need more. If you're making stickers to sell, the paid plans add watermark-free downloads and higher limits.
Frequently Asked Questions
Can I make die-cut stickers without a Cricut or cutting machine?
Yes. Print the sheet on sticker paper and cut around each sticker's white border with scissors — the outline the tool adds gives you a printed margin that hides small deviations. A machine only makes the edges faster and more consistent.
What is the difference between die-cut and kiss-cut stickers?
Die-cut goes through the sticker and its backing, making individually shaped pieces. Kiss-cut slices only the sticker layer and leaves the backing intact, producing peelable sheets. Home cutting machines do both — it is a blade-depth setting.
What sticker paper should I use with an inkjet printer?
Matte inkjet sticker paper is the most forgiving all-rounder. Glossy gives richer colour. For water-resistant stickers, print on printable vinyl and apply a clear laminate sheet before cutting. Laser printers need laser-rated stock — inkjet sheets can melt.
How does a cutting machine know where to cut my printed stickers?
Two pieces: a digital cut file that carries the contour of every sticker, and registration marks printed on the sheet that the machine's optical sensor reads to find the print's exact position. Machines never follow lines printed on the paper.
Why won't Silhouette Studio open my SVG cut file?
The free Silhouette Studio Basic edition cannot import SVG — that is a paid Designer Edition feature. Use the DXF cut file instead, which every Silhouette Studio edition opens.
Do I upload the SVG cut file to Cricut?
No. For Cricut, upload a transparent PNG of the sticker sheet and use Print Then Cut — Cricut prints it in full colour and auto-cuts each sticker from the transparent edge. Cricut treats any uploaded SVG as cut-only geometry and turns the printed artwork black, so the PNG is the right file. If you want just the cut contours, use Cut Lines Only (SVG). The SVG (artwork + cut lines) and DXF are for Silhouette, Brother and other vector cutters.
What size should my stickers be?
50 × 50 mm (about 2 inches) is the everyday size — 12 fit on an A4 sheet, leaving the corners clear for registration marks. 75 × 75 mm (about 3 inches) suits laptop lids and packaging. Both templates are free, and stickers can be resized and moved freely on the sheet.
Is the sticker maker really free?
Yes — the sticker templates, the automatic die-cut outline, and the SVG/DXF cut files are free to use in the browser with no software to install. Paid plans add watermark-free downloads and higher volume limits.
Can I sell the stickers I make?
Stickers made from your own artwork or photos are yours to sell. Just make sure any images, fonts, or characters you include are ones you have the rights to use commercially.