AI Photo Tools: Remove Backgrounds & Centre Faces in One Click
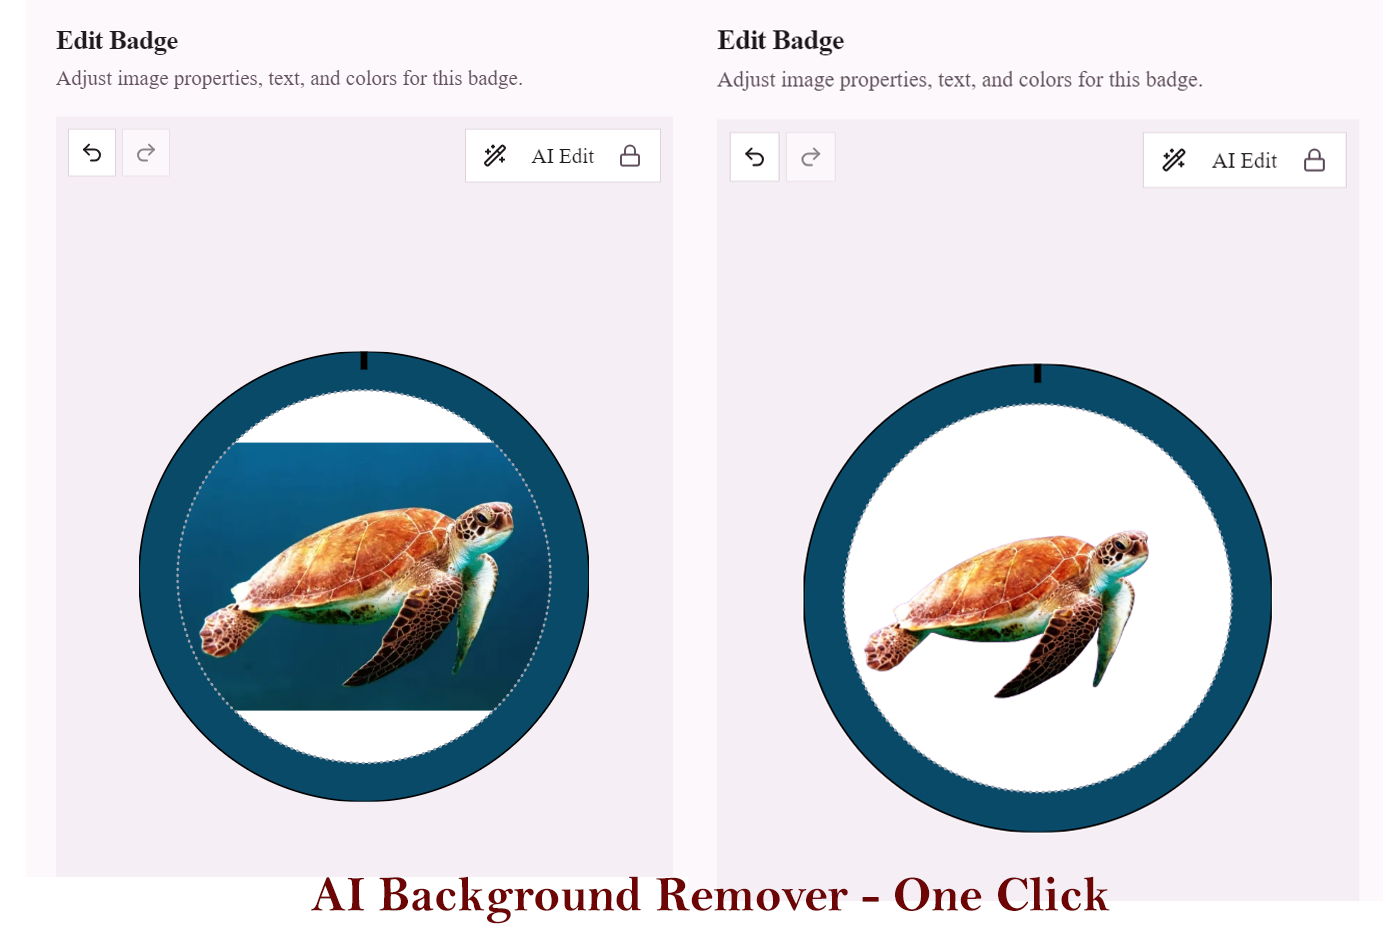
The photos people hand you for badges are rarely badge-ready — cluttered backgrounds, faces off to one side, dull lighting. My Badge Studio's built-in AI photo tools fix all three without ever leaving the editor: Remove BG cuts the subject out cleanly, Centre Face frames the person perfectly in the badge circle, and AI Edit handles everything else.
The three tools
- Remove BG — one click deletes the background, leaving a clean cut-out of the person or object. Put any colour behind it using the badge's face colour, and a messy kitchen selfie becomes a studio-look portrait.
- Centre Face — AI finds the face and repositions the photo so it sits perfectly centred in the badge — the difference between an amateur pin and a professional one, especially across a batch of school or staff badges.
- Remove BG for stickers — the same cut-out magic works on uploaded stickers, turning any image into a clean overlay.
Every AI action is undoable — Undo restores your original photo instantly, so experimenting costs nothing but the credit.
How to use them (step by step)
- Open your badge. Upload a photo in the Template Studio, hover the badge and click ✏️ Edit.
- On the Image tab, find AI Photo Tools at the top.
- Tap Remove BG — a few seconds later the background is gone. Set the badge face colour to taste.
- Tap Centre Face — the photo repositions so the face is framed in the middle of the badge.
- Fine-tune with the normal zoom, rotation and colour-adjustment controls.
Batch trick: processing a school's worth of badges? Remove BG + Centre Face on each photo gives every badge the same clean, centred look — the single biggest quality jump a badge batch can make.
How AI credits work
- Each AI action (Remove BG, Centre Face, an AI edit) uses 1 AI credit.
- Credits are bought in packs — 100 credits for $10 (local currency shown on the pricing page) — on any plan, including Free.
- Purchased credits never expire. They sit on your account until you use them, and your balance shows on your account page.
When to use which tool
- Busy background, good pose → Remove BG only.
- Clean background, off-centre subject → Centre Face only.
- Typical phone photo → Remove BG, then Centre Face — the two-click badge makeover.
- Logo or artwork with a white box around it → upload it as a sticker and use Remove BG there.
Upload a photo, tap Remove BG, and watch a everyday snapshot turn into a badge-ready portrait — try it in the studio.
Frequently Asked Questions
How do I remove a photo background for a badge?
Open the photo in the My Badge Studio editor, and on the Image tab tap Remove BG under AI Photo Tools. The AI cuts out the subject in seconds, and the badge's face colour becomes the new background. One AI credit per use, and Undo restores the original.
What does Centre Face do?
Centre Face uses AI to detect the face in your photo and automatically repositions the image so the face sits perfectly centred in the badge — ideal for making a whole batch of school, staff or event badges look consistent.
How much do AI credits cost?
AI credit packs are 100 credits for $10 (your local currency price is shown on the pricing page), purchased on any plan — including the Free plan. Each AI action uses one credit, and purchased credits never expire.
What if I don't like the AI result?
Tap Undo — your original photo is restored instantly. The AI edit replaces nothing permanently until you save the badge.