From Online Order to Printed Badge Sheet: How Store Orders Reach Your Studio
When a customer designs a badge on your store and orders it, you don't need to ask them to email a photo or rebuild their design. The order lands in your seller dashboard, and the design they made is already waiting in your Template Studio, ready to drop onto a sheet and print. Here is the whole journey, step by step.
Haven't built your store yet? Start with the complete guide to building your badge store website, or watch the step-by-step video tutorial.
1. The customer designs the badge on your product page
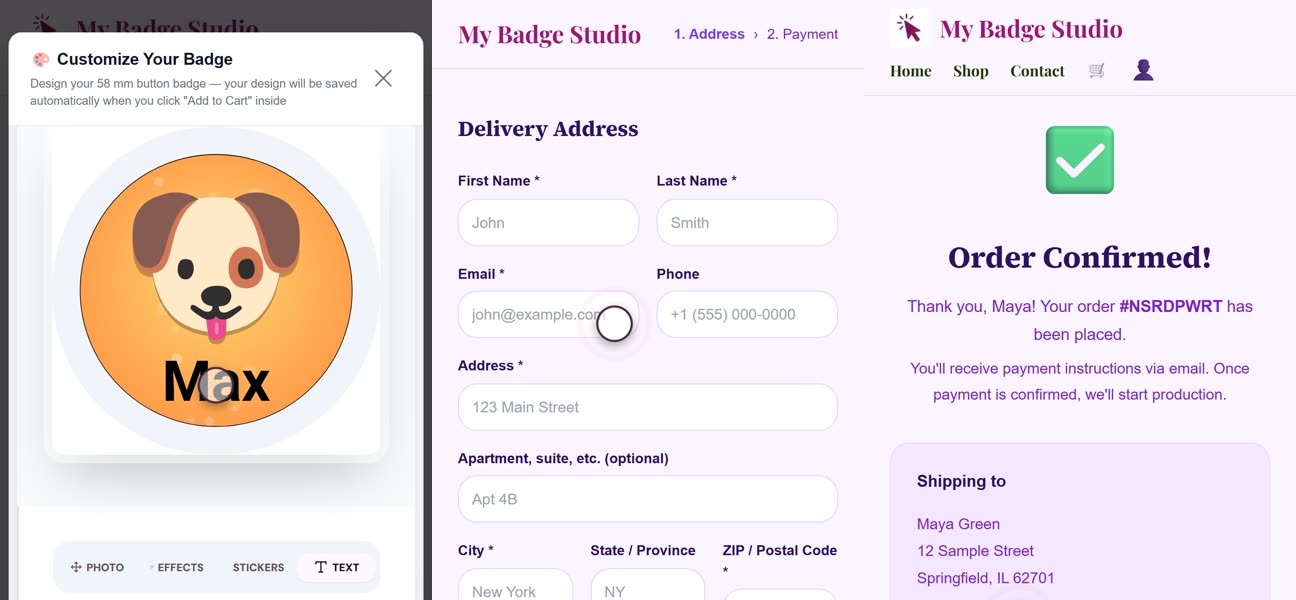
On a product page, the customer taps Customize Your Badge. A designer opens where they add their own photo, effects, stickers and words. When they click Add to Cart inside the designer, the design is saved with their cart. They can make more than one design for the same product with Add Another Design, and each finished design shows as a thumbnail they can edit or remove.
The quantity box sits under the designs. If you've set quantity pricing, a Quantity pricing box shows every price break, highlights the one that applies, and works out the price per badge and the total as the customer changes the number.
2. Quantity discounts apply on their own
You set price breaks per product: in your dashboard open Products, edit the product, and open the Quantity Tiers tab. Each row is a minimum quantity and the price per piece from that quantity. With no rows, the base price applies to every quantity.
The highest break the customer reaches sets the price of every piece of that product, and quantities of the same product add together, even across several designs. Different products don't combine. For a 58 mm badge at $1.75 with breaks at 25 and 100:
| Customer orders | Price per badge | Total |
|---|---|---|
| 6 badges | $1.75 (base price) | $10.50 |
| 30 badges | $1.58 (25+) | $47.40 |
| 120 badges | $1.40 (100+) | $168.00 |
The same price shows on the product page, in the cart (with the base price struck through) and at checkout, and it's the price the order is placed at.
3. Checkout and payment
Checkout asks for the customer's first name, last name and email, plus their address, city and ZIP / postal code when you deliver by courier. If you offer both courier delivery and store pickup, they choose first. No account is needed.
You choose which payment methods your store offers in the dashboard's Payment page:
- Pay by Invoice / Bank Transfer: on by default. The instructions you write are shown at checkout, so put everything the customer needs there, and ask them to use the order number as the payment reference.
- Scan & Pay: upload your payment QR code (PayID, UPI, Venmo, PayNow, PromptPay and similar) with a line of instructions.
- PayPal: the customer sees your PayPal email and uses the order number as the reference.
- Square: the customer is told you'll send them a secure Square payment link.
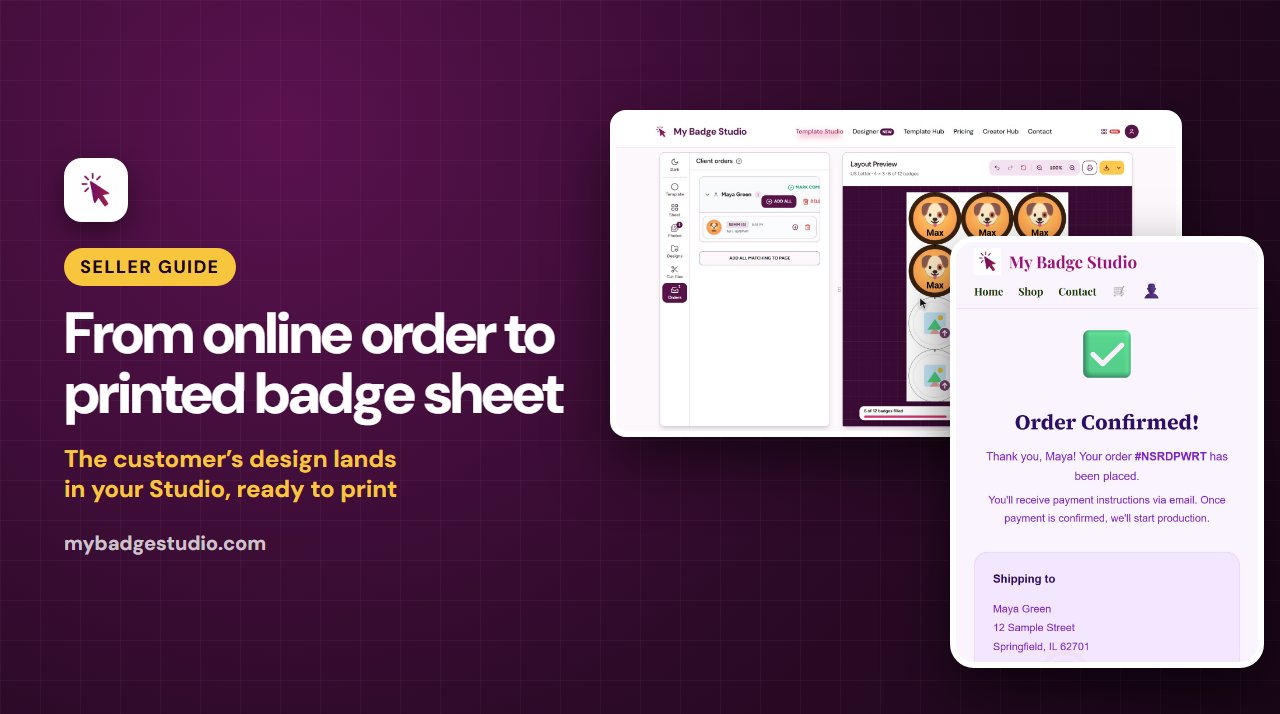
When the order is placed, the customer sees Order Confirmed! with an order number such as #NSRDPWRT, and gets an order confirmation email. You get a "You have a new order" email with the customer, items, total and delivery method. That same 8-character number follows the order everywhere: your dashboard, the invoice, the customer's emails and the Studio.
4. The order in your dashboard
Open Orders in your seller dashboard. Store orders carry a purple Store badge and start as Received. From each row you can download the customer's original images, download a PDF invoice, or email the invoice to the customer. Search, filter by month and year, or export everything to Excel from the toolbar.
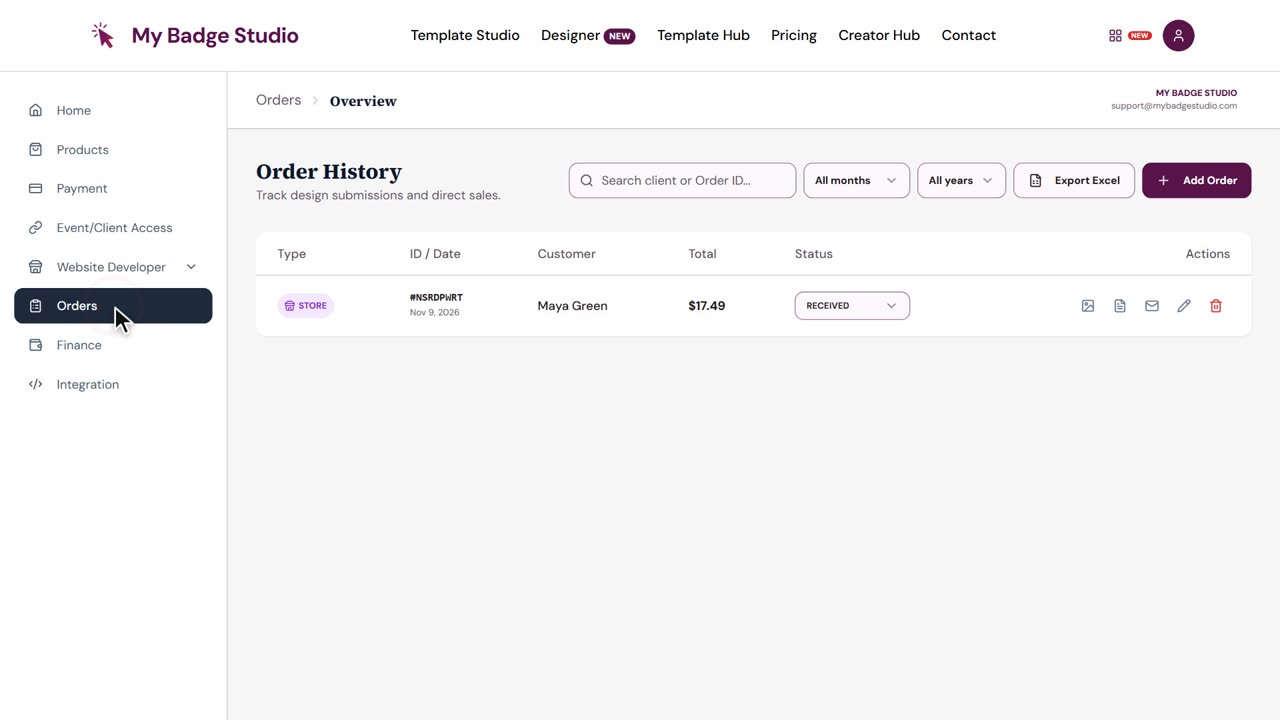
Move the order through Paid, Processing, Shipped and Completed as you go (or Cancelled). Changing the status doesn't email the customer, so drop them a note when their badges are on the way or ready to collect.
5. The design is already in your Studio
Open the Template Studio and the template the customer ordered, for example the 58 mm badge sheet. Then click Orders in the left-hand rail to open Client orders. Designs are grouped by customer, and each one shows its size, quantity and Ref: the same order number as in your dashboard.
- + next to a design adds it to the sheet with the quantity ordered.
- Add All adds every design from that customer.
- Add All matching to Page adds every waiting design that matches the open template, from all customers.
If a design's size doesn't match the open template, the Studio warns you before adding it, so a 44 mm design never lands on a 58 mm sheet by mistake.
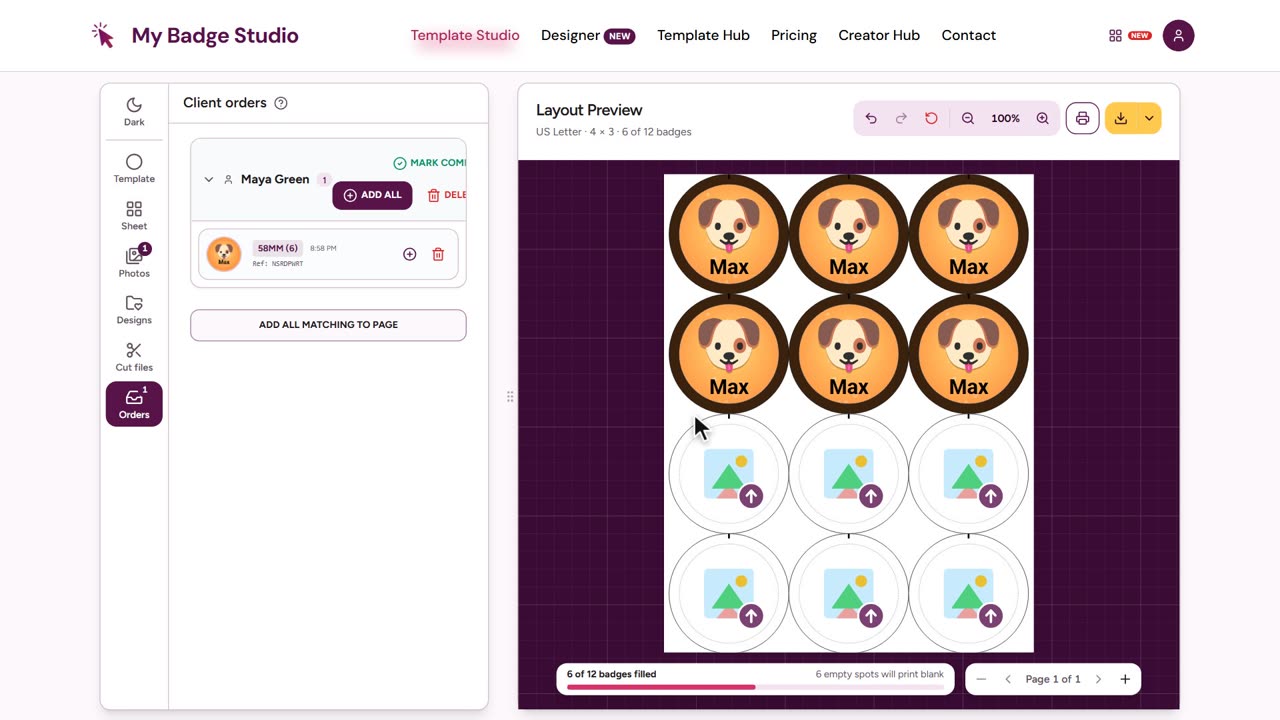
Designs arrive the moment the order is placed, before it's paid. That lets you set up the sheet straight away and print once the payment comes in.
6. Print, press and send
Fill any empty spaces with other orders, then print at 100% / Actual size so the badges come out exactly the right size. Press them, then mark the order Processing and Shipped or Completed in your dashboard.
What you need
- Business Pro to publish your own store website. A store only takes orders while you're on a live paid plan.
- The Client orders inbox in the Studio comes with Business Plus and Business Pro.
Compare plans on the pricing page. Just getting started? Read how to start a button badge business.
Frequently Asked Questions
Do my customers need to email me their photos?
No. Customers design the badge on your product page, and the design travels with the order into your Template Studio's Client orders, with the right size and quantity. You open it, add it to a sheet and print.
How do quantity discounts work in my store?
In the product editor's Quantity Tiers tab, add rows of a minimum quantity and a price per piece. The highest break a customer reaches sets the price of every piece of that product, and quantities of the same product add together across designs. The product page, cart and checkout all show the same price.
When does the customer's design reach my Studio?
As soon as the order is placed, before payment. You can set up the sheet straight away and print once the order is paid.
Which payment methods can my store offer?
Pay by Invoice / Bank Transfer with your own instructions, Scan & Pay with your payment QR code, PayPal (the customer pays to your PayPal email with the order number as the reference) and Square (you send a payment link). You choose them on the dashboard's Payment page.
What is the order number?
An 8-character code such as #NSRDPWRT. It's on the customer's confirmation page and emails, your new-order email, your dashboard and invoice, and on the design in the Studio's Client orders, so it's easy to match everything up.
Which plan do I need?
Business Pro to publish your store website; the Studio's Client orders inbox comes with Business Plus and Business Pro. A store only takes orders while your plan is active.