Photo Magnets: Turn Your Pictures into Instant-Style Fridge Magnets

The instant-photo fridge magnet — white frame, square picture, a handwritten Lisbon 2023 underneath — is one of the most-loved photo gifts there is. Here is how to make them yourself with an inkjet printer and a sheet of magnetic paper.
What you need
- Printable magnetic sheets — sold as "magnetic photo paper" or "printable magnet sheets" for inkjet printers, in A4 and US Letter. Matte takes handwriting-style captions beautifully; gloss makes photos pop.
- Your photos — anything from your phone works. The square window crops each picture, so faces and subjects should sit near the middle.
- Scissors or a guillotine — the cuts are straight lines, so a ruler and blade give the cleanest edge.
The layout is the hard part — so don't do it by hand
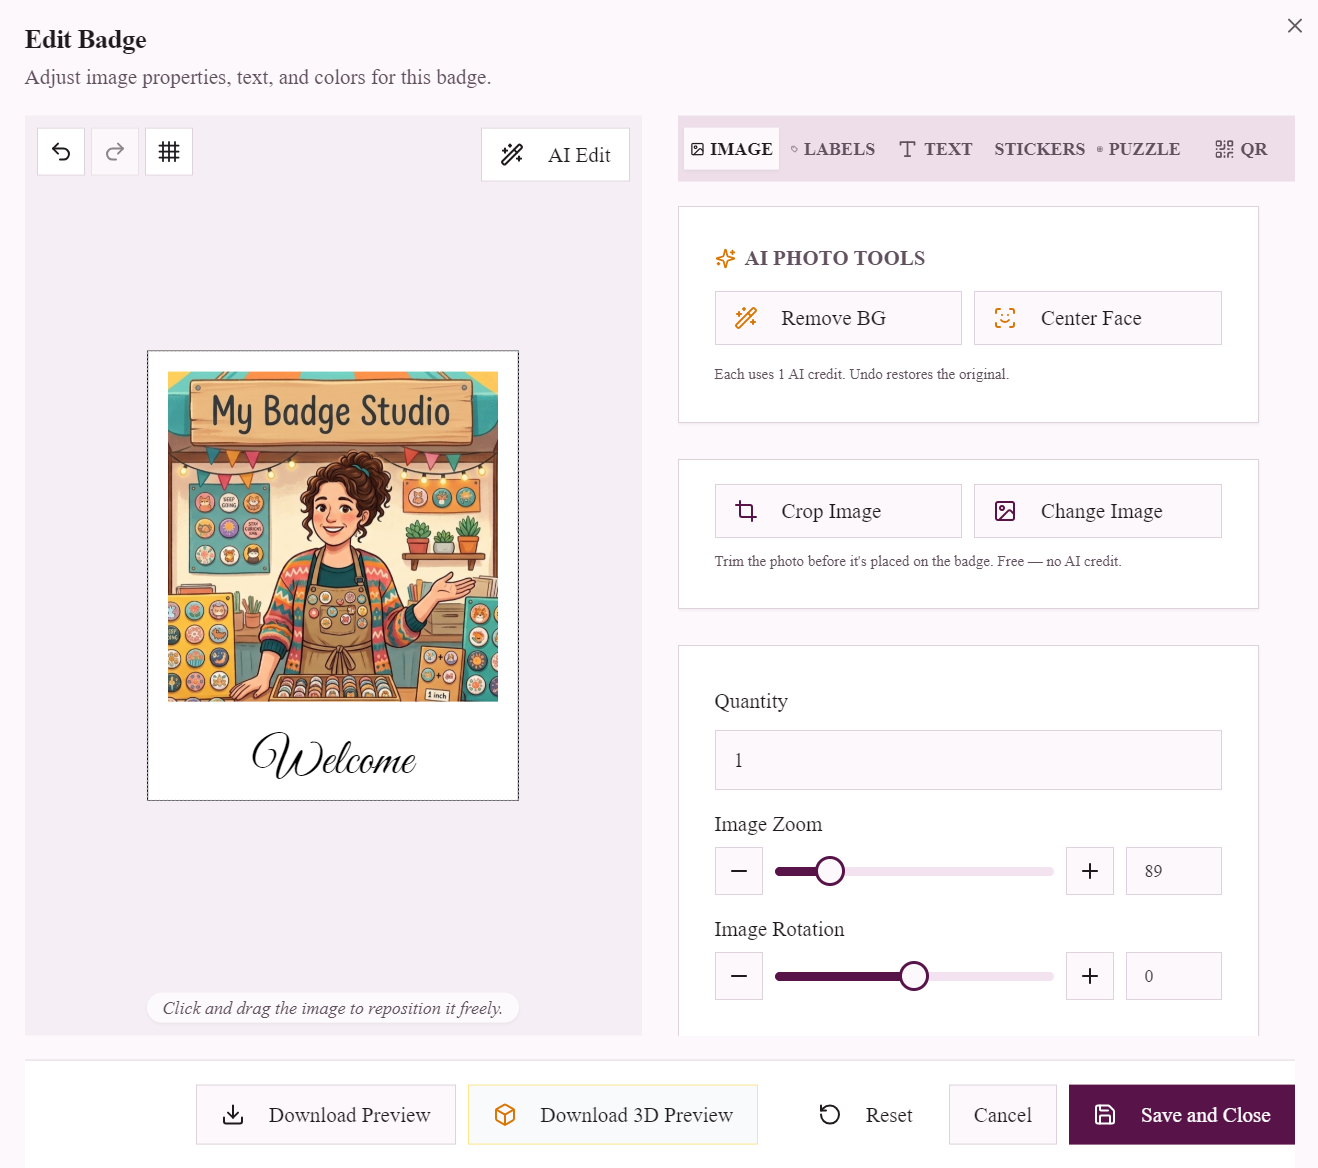
Getting four photos, four frames and four captions aligned on one sheet in a word processor is an afternoon of nudging text boxes. The photo magnet template does the whole thing: upload your pictures, and each one appears in a white instant-photo frame with a caption ready to edit — drag the photo to position it in the window, write your caption in a handwriting font, and download a print-ready PDF with cut lines.
Step by step
- Open the template. In the studio, choose Photo Magnet — classic 89×108mm or mini 54×66mm — and your paper size. The sheet layout, frames and cut lines appear automatically.
- Upload your photos. Each photo drops into its own white frame. Phone photos work as they are — iPhone HEIC files are converted automatically.
- Position each picture. Drag the photo inside its square window; use the zoom buttons for fine control. Faces sit best slightly above centre, the way a real instant photo crops.
- Write the captions. Tap the caption under each photo and type your own — date, place, name, joke. Change the handwriting font or colour if you like, or delete it for a clean frame.
- Download and print. Export a PDF for home printing and hand-cutting — or a transparent PNG (plus a cut-lines SVG) if a Cricut is doing the cutting. You can also download a JPG for quick sharing. Print on a magnetic sheet at 100% scale and cut along the printed lines. Done — the whole batch takes minutes, not an afternoon.
Choosing magnetic sheets
All "printable magnetic paper" is a thin flexible magnet with a printable white face, but three things separate the good sheets from the frustrating ones:
- Finish. Matte hides fingerprints and gives captions a soft, paper-like look; gloss makes photo colours punchier but shows glare under kitchen lights. For the instant-photo style, matte is the more convincing finish.
- Thickness. Around 0.3mm feeds through most inkjets like card stock and still holds firmly to a fridge. Thicker sheets (0.5mm+) grip better but many home printers cannot feed them — check your printer's media rating before buying.
- Inkjet, not laser. Almost all magnetic sheets are inkjet-only: laser fuser heat can warp the magnet and damage the printer. If you only have a laser printer, print on photo paper and use adhesive magnet backing sheets instead.
Cutting clean edges
Scissors work, but the straight edges of the instant-photo frame show every wobble. A guillotine or rotary trimmer gives shop-quality edges in a fraction of the time — line the blade up with the printed cut line and take the whole column in one pass. Cut the long lines first, then the short ones, and the sheet stays rigid for every cut.
Let a Cricut cut the whole batch
If you own a Cricut or similar cutting machine, you can skip the trimmer entirely and have the machine cut every magnet for you. Two routes work, and the studio exports the file each one needs:
- Print Then Cut (best for photos). Download your sheet as a transparent-background PNG, print it on your magnetic sheet, then in Cricut Design Space choose Print Then Cut. The machine reads the printed sheet and cuts each magnet to its edge — your photos print in full colour and get cut cleanly, all in one pass.
- Cut Lines Only (SVG). Want to print and cut as separate steps, or cut a batch of blanks? Download the Cut Lines Only (SVG) file — just the outlines, no images — and load it straight into Design Space.
One catch worth knowing: Cricut treats the images inside an uploaded SVG as solid black, so never upload a full-colour SVG expecting it to print — use the transparent PNG with Print Then Cut for anything with a photo. Magnetic sheets are also thicker than paper, so set the machine to its magnet or a custom material setting and run a test cut first. The full walkthrough, with screenshots, is in our Cricut cutting guide.
How long do they last?
On a fridge, years. Inkjet ink on magnetic stock is reasonably fade-resistant indoors, but two things shorten its life: direct sunlight (a fridge by a bright window will fade reds first) and kitchen grease (wipe with a barely damp cloth, never a soaked one — the printable face is paper-like and does not love water). For gifts, a quick pass with a clear matte fixative spray seals the ink and adds wipe resistance.
Classic or mini?
Classic (89×108mm / 3.5×4.25") is the size people recognise — 4 per A4 sheet, right for gifts and keepsakes. Mini (54×66mm) fits 12 per sheet, which is what you want for wedding favours or party giveaways where every guest gets one.
Caption ideas that make them
- Place and year — Positano 2026
- Name and date for baby milestones — Sebastian, 6 months
- The couple and the day — Mr & Mrs Wright, 14.06.2026
- A private joke. The best captions are the ones only your fridge understands.
Printing tips
- Print at 100% scale ("actual size") — the PDF is laid out to the millimetre, and "fit to page" shrinks it.
- Check which side your printer prints on with a plain-paper test first; magnetic sheets only print on the white side.
- Let the ink dry a few minutes before cutting — magnetic stock absorbs ink more slowly than photo paper.
Frequently Asked Questions
How do I make photo magnets at home?
Design them in an online template that frames each photo and adds a caption, download the PDF, print it on inkjet-printable magnetic sheets at 100% scale, and cut along the printed lines with scissors or a guillotine.
What size are polaroid-style photo magnets?
The classic instant-photo size is 89×108mm (3.5×4.25 inches) with a square photo window. A mini version at 54×66mm fits twelve magnets on one A4 sheet.
What paper do you use for fridge magnets?
Printable flexible magnet sheets — sold as magnetic photo paper for inkjet printers — in A4 or US Letter. No laminating or gluing: the sheet is the magnet.
Can I cut photo magnets with a Cricut?
Yes. Download the sheet as a transparent-background PNG, print it on your magnetic sheet, then use Cricut's Print Then Cut to cut each magnet to size — or download the Cut Lines Only SVG for just the outlines. Set the machine to a magnet or custom material thickness and run a test cut first, since magnetic sheets are thicker than paper.