How to Make Credit Card Skins: Template, Exact Size & Cutting Guide
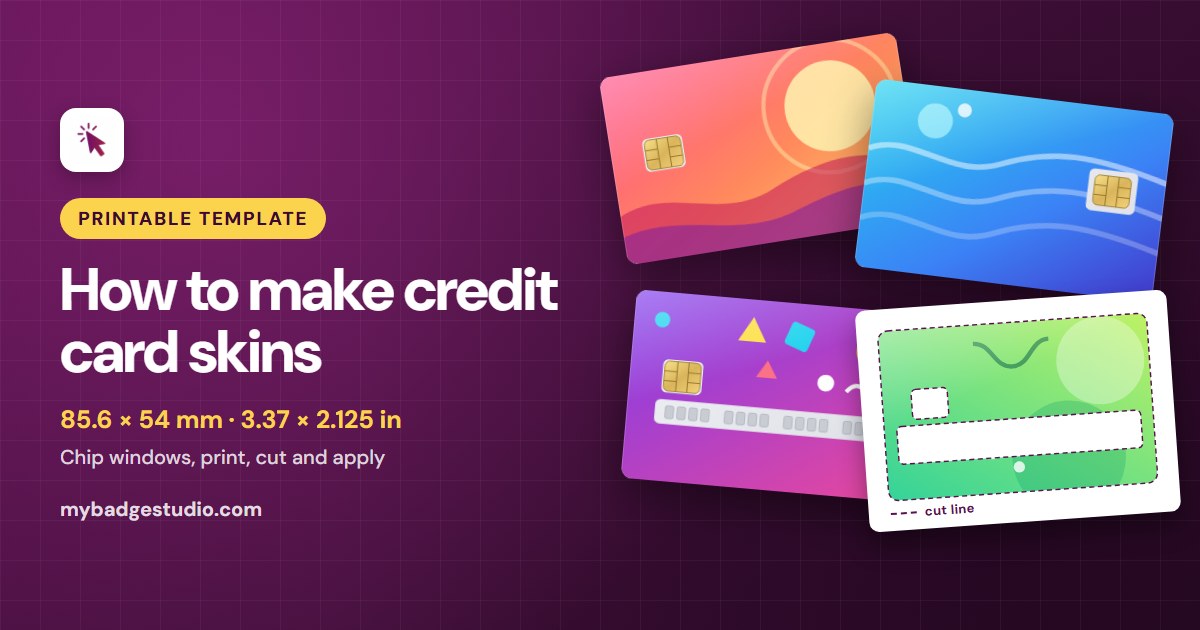
A credit card skin is a thin vinyl sticker cut to the exact shape of a bank card, with a window that leaves the chip uncovered. You can make your own with printable vinyl, a home printer and a Cricut, a Silhouette or a craft knife. Here's the exact size in mm and inches, which version fits your card, and how to print, cut and apply a skin, plus tips if you want to sell them.
What is a credit card skin?
A credit card skin (also called a card sticker, card wrap or debit card sticker) covers the front of a bank card, gift card or ID card with your own design. It changes how the card looks, not how it works: the chip stays uncovered, so the card goes into readers just as before.
Who makes and buys them:
- Personalisation: a favourite colour, a pet photo, initials, or a card that's easy to spot in a full wallet.
- Fandom and aesthetics: anime-style art, games and music, pastel and marble patterns, retro and Y2K looks.
- Gifts: a photo skin for a partner, or matching skins for friends.
- Small shops: skins are small, light and cheap to post, which suits Etsy shops and craft-fair stalls.
Credit card skin size in mm and inches
Bank cards follow the international ID-1 format (ISO/IEC 7810), which card printers call CR80. Almost every credit, debit and prepaid card shares this outline, whatever the bank or country, so one template fits them all.
| Measurement | Millimetres | Inches |
|---|---|---|
| Width | 85.60 mm | 3.370 in |
| Height | 53.98 mm | 2.125 in |
| Corner radius | 3.18 mm | 1/8 in (0.125 in) |
| Card thickness (for reference) | 0.76 mm | 0.03 in |
You'll often see the size rounded to 85.6 × 54 mm or 3.375 × 2.125 in (3⅜ × 2⅛ in): it's the same card. Most gift cards, hotel key cards, ID badges and library, gym and membership cards use the same CR80 size, so the same template fits them. For other card and badge sizes, see the ID and name badge size chart.
Which version do you need?
Cards differ in two ways that matter for a skin: how big the chip is, and whether the card number is printed flat or raised (embossed). Look at your card, then pick the matching version:
| Version | What's cut out | Use it for |
|---|---|---|
| Full cover | Nothing: the skin covers the whole face | Gift, ID and membership cards with no chip, or a card back (keep the magnetic stripe, signature strip and security code clear) |
| Small chip window | A window just around the chip | Most current bank cards: a compact chip and a flat printed number |
| Big chip window | A larger window around the chip | Cards with a bigger chip plate, or for more room when lining up |
| Number stripe, small | The chip window plus a slot over the card number | Cards with a raised (embossed) number, which a flat skin can't cover neatly |
| Number stripe, big | The chip window plus a taller slot over the number and expiry date | Embossed cards where the expiry date is raised too |
Chip on the left or right. Both chip windows come in left and right versions. Most cards have the chip on the left of the front; the right-hand versions are for a card or design that needs the window on the other side.
Closed or opened stripe. A closed stripe has vinyl all the way around it: tidy, but it must sit exactly over the raised digits. An opened stripe runs out through the bottom edge, leaving a notch that slides around the number and keeps the name and expiry date uncovered too, so it's the easier fit for cards with lots of raised lettering. Stripe versions keep the chip window.
Not sure? Print one skin on plain paper, cut it out and hold it over your card. It takes two minutes and saves a sheet of vinyl.
Materials
- Printable vinyl sticker paper made for your printer (most is for inkjet). Glossy gives the brightest colours; matte hides fingerprints and glare.
- Clear laminate overlay (optional, recommended): a self-adhesive clear sheet that goes over the print before cutting, against scratches, water and ink rubbing off in a wallet.
- A way to cut: a Cricut or Silhouette with print-and-cut, or a craft knife, a steel ruler, a cutting mat and a 1/8 in (3 mm) corner rounder punch.
- For applying: a lint-free cloth and a plastic squeegee (an old gift card works).
Avoid metallic and foil vinyl. Tap-to-pay works through a small antenna inside the card, and a metal layer on top of it can weaken or block the signal. That includes chrome, mirror and foil vinyl and some holographic films. Ordinary printable vinyl and clear laminate generally don't get in the way, but test a contactless payment after applying any skin.
Printing
- Print at 100% / Actual size, never "Fit to page", which shrinks everything by a few percent. See printing at actual size.
- Pick a matching paper setting (glossy or matte photo paper, best quality) so the ink doesn't pool on the vinyl.
- Check one skin with a ruler. It should measure 85.6 mm (3⅜ in) wide and 54 mm (2⅛ in) tall. If it doesn't, fix the scale before you print more.
- Let the ink dry as the vinyl's instructions say, then laminate before cutting.
The template already has the cut lines: the outline, the rounded corners and the windows. Keep faces and text away from the edges and windows, and run the background right to the edge: a full-colour edge hides a small cutting shift better than a thin border.
Cutting: machine or by hand
With a Cricut or Silhouette
Both work the same way: the software adds registration marks around the design, you print the sheet, and the machine's sensor reads the marks to line the cut up with the print.
- Cricut calls this Print Then Cut and prints its own marks, so don't add a second set to your file. Check that the windows will be cut, not just the outer edge.
- Silhouette adds registration marks in Silhouette Studio, and the machine's optical eye reads them before cutting.
- Use your machine's setting for printable vinyl, so the blade cuts the vinyl but not the backing sheet (a kiss cut), and cut one test skin before the whole sheet.
There's more detail in cutting marks vs registration marks and how to cut templates with a Cricut.
By hand
- Cut the windows first, while the sheet is still big and easy to hold: a sharp new blade and light, repeated passes.
- Cut the straight edges with a craft knife against a steel ruler, on a cutting mat.
- Round the corners with a 1/8 in (3 mm) corner rounder punch, which matches the card's 3.18 mm radius.
How to put a skin on a credit card
- Clean the card. Wipe off dust and grease with a lint-free cloth.
- Line up the chip window first. Peel back part of the backing and set the window around the chip; everything else follows from it.
- Smooth from the centre out with a squeegee or an old card, pushing bubbles to the edges as you peel off the rest of the backing.
- Press the edges and corners down firmly. A lifting edge can catch in a card slot or an ATM.
- Test the card: insert it in a chip reader and try a contactless payment.
Keep the card usable
- Never cover the chip contacts. Card readers touch the gold pads directly.
- On the back, leave what matters uncovered: the signature strip, the security code and the magnetic stripe.
- Keep the card number readable, with the name and expiry date, where your bank or shops need to see them.
- On an ID or membership card, keep the photo, the name and any barcode or QR code visible.
- Read your card's terms. Some banks discourage or don't allow stickers on their cards, and the card usually remains the bank's property.
Selling credit card skins on Etsy
You can sell card skins in two ways, and many shops do both:
- Digital templates: the buyer prints and cuts. Nothing to ship, but include clear instructions: print at actual size, which version fits which card, and how to cut.
- Finished skins: you print, laminate, cut and post. More work per order, but the buyer gets a ready-to-apply product.
A few things that help:
- List the versions as options (chip size and side, number stripe) and show buyers how to check their own card.
- Popular themes include anime-style and fan art, pastel and aesthetic patterns, marble and gradients, cute animals, pet photos, names and initials, and seasonal designs. Sell only artwork you made or have a licence for, and leave off bank and card-network logos.
- Packaging: post skins flat with a card backer or in a rigid mailer so the corners don't bend, and include a short application guide.
- Product photos: show the skin on a blank or sample card, never on a card with a real number.
- Be clear in the listing that skins are decorative and buyers should check their bank's terms.
Selling stickers too? See how to make stickers to sell on Etsy.
How to make credit card skins in My Badge Studio
- Open the template. Start from the credit card skin template, or pick it from the Studio's template picker.
- Choose a version. In the Studio's Template panel, scroll to Badge Shape & Size and open the Skin style menu, just below the card size: full cover, a small or big chip window on the left or right, or a number stripe, closed or opened. You can switch at any time; your pictures stay in place.
- Add your photo or design, then position it, zoom and add text. The windows are marked, so you can keep faces and text clear of them.
- Fill the sheet. A sheet holds 8 skins on A4, 6 on US Letter and 18 on A3, each with its own design if you like. The spacing leaves the corners clear for a cutting machine's registration marks.
- Download the print-ready PDF with the cut lines in place, and print at 100%. Plans that include cut files can also export them for a cutting machine.
The template is part of the Business plan and above, which also gives you unlimited prints and PDF downloads with no watermark.
Frequently Asked Questions
What size is a credit card skin in inches?
3.370 × 2.125 inches, often rounded to 3.375 × 2.125 in (3⅜ × 2⅛ in), with 1/8 inch rounded corners. In millimetres it's 85.60 × 53.98 mm: the standard CR80 (ID-1) size shared by bank cards.
Does a card skin block contactless payments?
An ordinary printed vinyl skin generally doesn't, because contactless works by radio through the plastic. Metallic, chrome, mirror or foil vinyl can weaken or block the signal. Try a tap payment after applying the skin, and take it off if the card stops working.
What is the best paper for credit card skins?
Printable vinyl sticker paper made for your printer, glossy or matte, with a clear laminate on top for scratch and water resistance. Paper sticker labels wear through quickly in a wallet, and metallic or foil vinyl can interfere with tap-to-pay.
Can I put a skin on a debit card?
Yes. Credit, debit and prepaid cards share the same CR80 size and chip position, so the same template fits. Keep the chip, signature strip and magnetic stripe uncovered, and check your bank's terms first, since some banks discourage stickers on their cards.
How many card skins fit on one sheet?
8 on A4, 6 on US Letter and 18 on A3, and each skin on the sheet can have its own design. They are spaced so a cutting machine can read its registration marks.
What corner radius does a credit card have?
3.18 mm, which is 1/8 inch. A 1/8 inch or 3 mm corner rounder punch gives the same curve when you cut skins by hand.